Advanced Crochet Stitches
I'm going to start with these 3 advanced crochet stitches to get you started: crochet spike stitch, crochet loop stitch and the crochet bullion stitch.
These advanced stitches tend to be a lot more work and usually require a lot more practice and patience. You'll want to give yourself extra time to learn them and extra time to work them.
The benefits of that, though, are some really awesome stitches, which give you beautifully crocheted projects.
Don’t let the extra work steer you away. These really are great stitches. You’ve learned all the basics that you need to make these. Now you just need time to perfect them in just the right way.
Give these advanced crochet stitches a try. You might find that they aren’t as difficult as you anticipated. I know you’ll love the results.
Crochet Spike Stitch
Crochet spike stitch, crochet long stitch, and crochet dropped stitch are all names for this particular stitch.
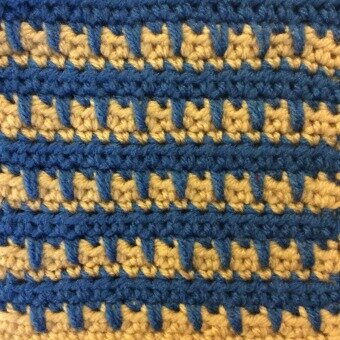
It’s made by working, or dropping, stitches over the top of stitches in the previous row.
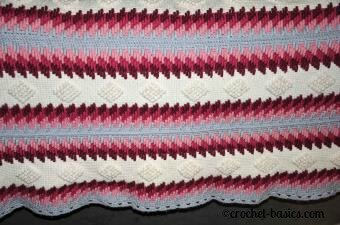
This stitch looks great using contrasting colors that really make your spike stitches stand out.
In general spike stitches are not difficult to make. What makes these advanced crochet stitches is that they can be hard to place correctly. They need to lay straight. You don’t want your stitches to look crooked. It can throw off the overall look of your project.
So take your time and check your work. Take out any stitches that are off and re-do them. You'll be much happier with the end result.
In no time you’ll be placing your stitches perfectly, but do be patient with yourself while you’re learning.
Advanced Crochet Stitch Help . . .
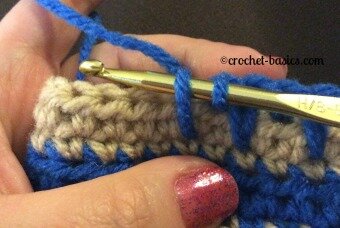
This stitch is beautiful worked all in the same color of yarn. However, it may help you more while you’re learning to work the spike stitches in a different color. Then you can really see your stitches and where and how they sit.
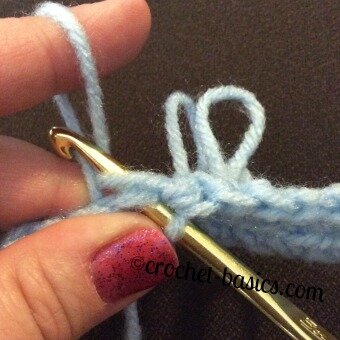
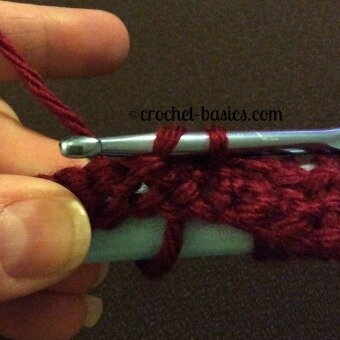
Your pattern will tell you where to drop your stitches to. In my example I’ve worked single crochet spike stitches (in blue) over double crochet stitches (in tan).
It might say, "spike stitch two rows below". Find the hole, two rows below, that looks like it's just under the stitch you're working. Work the stitch. If it doesn't lay the way you want, take it out and try a different hole. You'll quickly learn which one is the "right" hole for your project. |
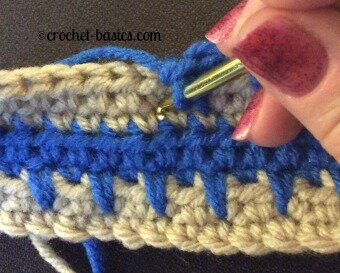 |
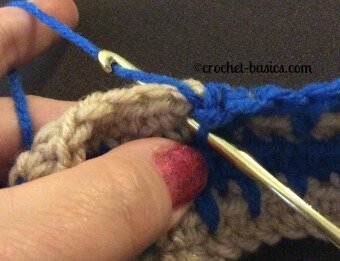
- Hook the yarn and pull it through to the front of your work.
 |
 |
|
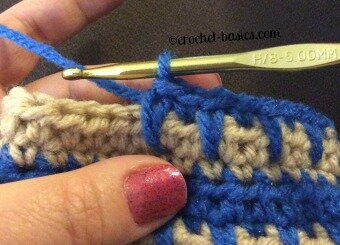 |
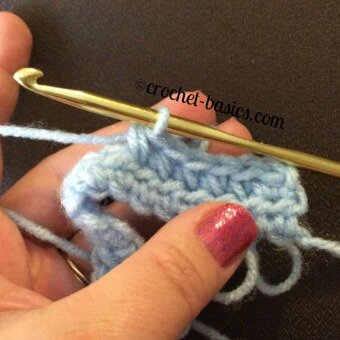
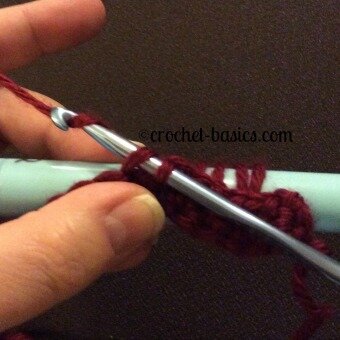
Be sure not to pull the stitch too tight or your fabric will pucker. If you don’t pull it tight enough your spike stitches will be loose and messy. You’ll need to find that balance where these advanced crochet stitches will lay flat and snug without bunching. You’ll get there!
My example is worked using this pattern:
- Row 1: dc across – tan
- Row 2: sc spike stitch – blue (one sc, one sc spike stitch, repeated)
- Row 3: sc – blue
- Repeat rows 1-3 for pattern
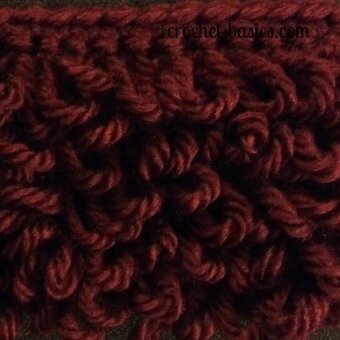
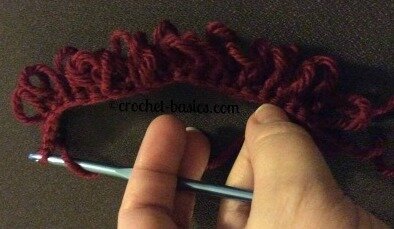
Crochet Loop Stitch
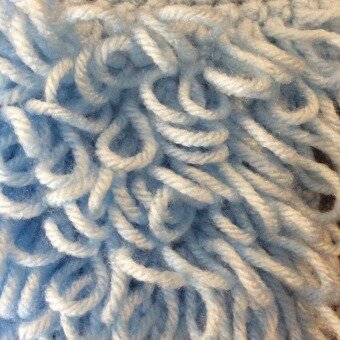
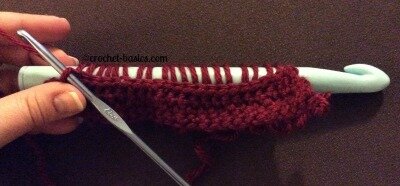
The crochet loop stitch is just a lot of fun. It can make really playful edging or add lots of texture and personality to a project.
It is a little time consuming compared to other stitches and it uses up quite a bit of yarn.
Here's the stitch:
|
 |
|
 |
|
 |
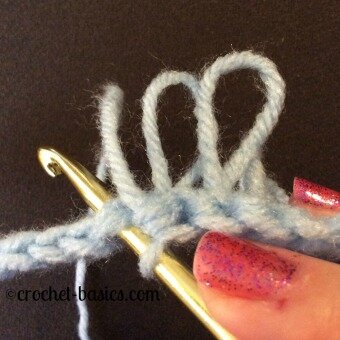
You can see in the picture above (showing the loop made with your index finger) how I hook the 2 strands to pull them through.
You'll want to come around the front of the two strands. Turn your hook so it faces down and pull the strands through.
This is a little backwards from how you're used to hooking the yarn. It may take a few tries to get the hang of it.
- Let the loop slip from your finger
- Yo and pull through the 3 loops on your hook
 |
 |
- Gently pull the loop to tighten your stitch
This is an advanced crochet stitch because keeping the length of the loops even can be difficult. It just takes practice, sometimes, lots of practice.
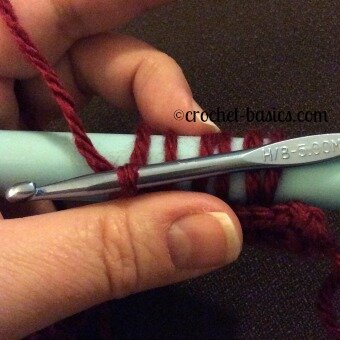
If you’re really struggling with keeping them even, use either a stiff card cut to the right size or a size Q crochet hook to help you be more consistent.
 |
Advanced Crochet Stitch Help . . .In my pictures I’m using a size Q crochet hook. This works well, but it will give you smaller, tighter loops. So keep that in mind. |
Here's how to work with a card/hook:
|
 |
Your crochet hook that you’re actually working with can sometimes get in your way. Be sure that the yarn is behind your working hook. |
 |
Advanced Crochet Stitches Help . . .
If you’re having trouble working this try transferring your work to your left hand and working the rest of the stitch from there.
- Yo and pull through the 2 loops on the hook
 |
 |
- Follow this same technique to the end of the row, then gentle remove the card/hook.
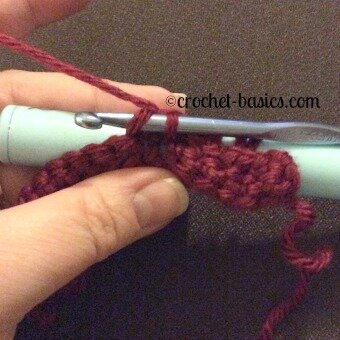
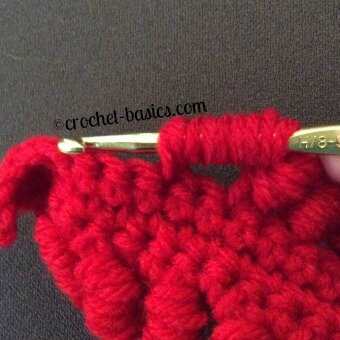
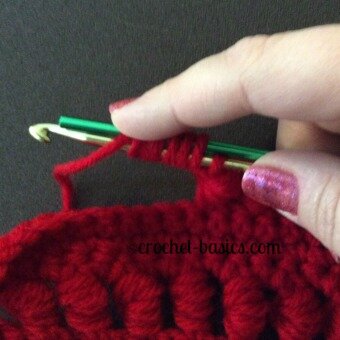
Crochet Bullion Stitch
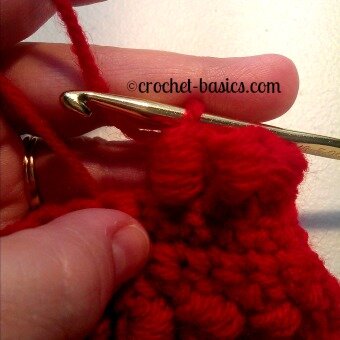
The crochet bullion stitch, also called the roll stitch, looks so wonderful in projects. It's made by wrapping many loops on your hook and pulling a yarn loop through them.
It’s used a lot in freeform crochet as well as in flowers and afghans. However, this is not an easy stitch to perfect. This is definitely an advanced crochet stitch.
The concept of the bullion is quite simple, the execution is much more difficult. This advance crochet stitch takes some time to master.
Here are the steps to it:
|
 |
|
--Insert the hook through the next stitch |
 |
|
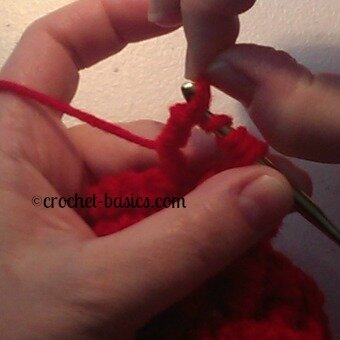
Yo and pull through. |
 |
|
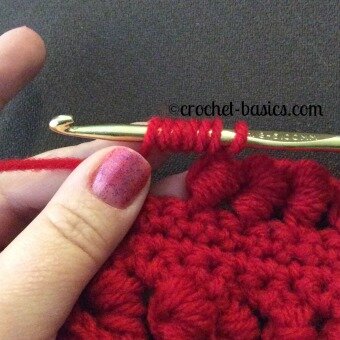
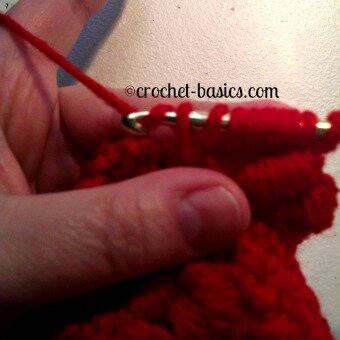
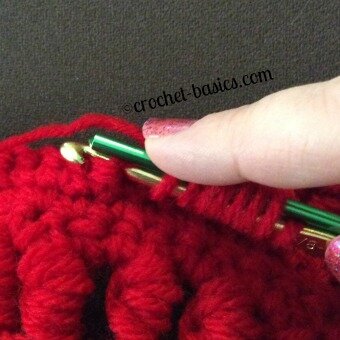
Yo again and pull through all 9 loops on the hook. |
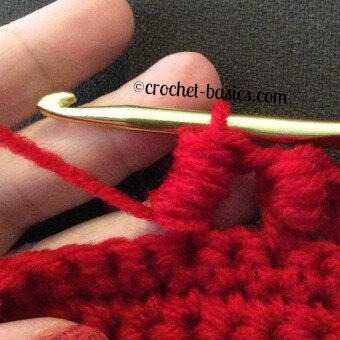 |
I’m sure you've guessed by now that the hard part is pulling the last loop through all 9 (or more) loops. You would be correct!
You will have to practice this bullion stitch and find the best method for you to accomplish this.
Some amazing crocheters can slip the yarn through all the loops in one swoop with no problem. That's so impressive and I hope to get there some day.
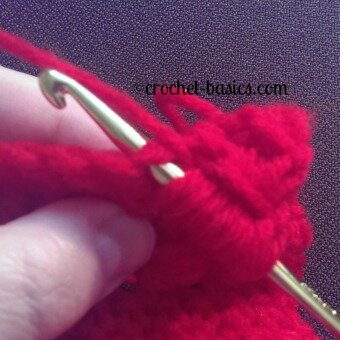
But for those of us who can’t get it done that easily here are a couple of techniques that may help.
Some crocheters will pull through the first several stitches at once. Then turn the hook so it's facing up and carefully lift the other loops over the hook one by one.
 |
 |
I've used this method and it definitely helps makes it easier. You need to be careful not to pull the loops too much, though. They will end up loose and sloppy.
Another technique I have learned is to use a second, much smaller, crochet hook (or knitting needle) to help.
|
 |
|
 |
|
--yo and pull up a loop --carefully slide the extra hook out of the loops --yo and pull through all loops |
|
Find a technique that works for you, maybe one of these, or maybe one of your own. The way it’s accomplished isn’t the most important part, the end result is.
|
Most bullion stitches are made with 7-12 loops on the hook but can really be made with as many as the pattern designer decides. |
Just remember you’ll need lots of practice and lots of patience. Don’t try to rush through. Take your time and you will get there! |
Don’t forget – crochet is supposed to be fun! So enjoy learning and enjoy making something new!
These are just a few of the advanced crochet stitches out there. Try new ones as you come across them and continue to add to your skills.
Home › Textured Crochet Stitches › Crochet Cable Stitch › Advanced Crochet StitchesCrochet-Basics Buzz
Sign up for our newsletter and you'll be up to date on all the latest buzz.
Sign Me Up
Recent Articles
-
Hyperbolic Crochet
Feb 08, 18 03:22 PM

I found a website, https://www.math.cornell.edu/~dwh/papers/crochet/crochet.html that is very informative. I think it is interesting but I have not tried
-
Interlocking Crochet
Apr 25, 17 07:58 PM
The pattern is reversible and appears different on both sides.
-
Crochet Star
Feb 07, 17 04:50 PM
Crochet stars are fun for any time of year. Here’s a walk-through of my favorites.
©Copyright 2013-2018
All rights reserved.
Nothing on this page is public domain.